Friday, December 13, 2013

Nativity-Craft Goodies

So guess who thought the 13th was really the 12th and missed her post day?
 Oh yes, that would be me!
Wendy here, a day late, but here--and after the crazy week that it's been, that is pretty darn good.
 
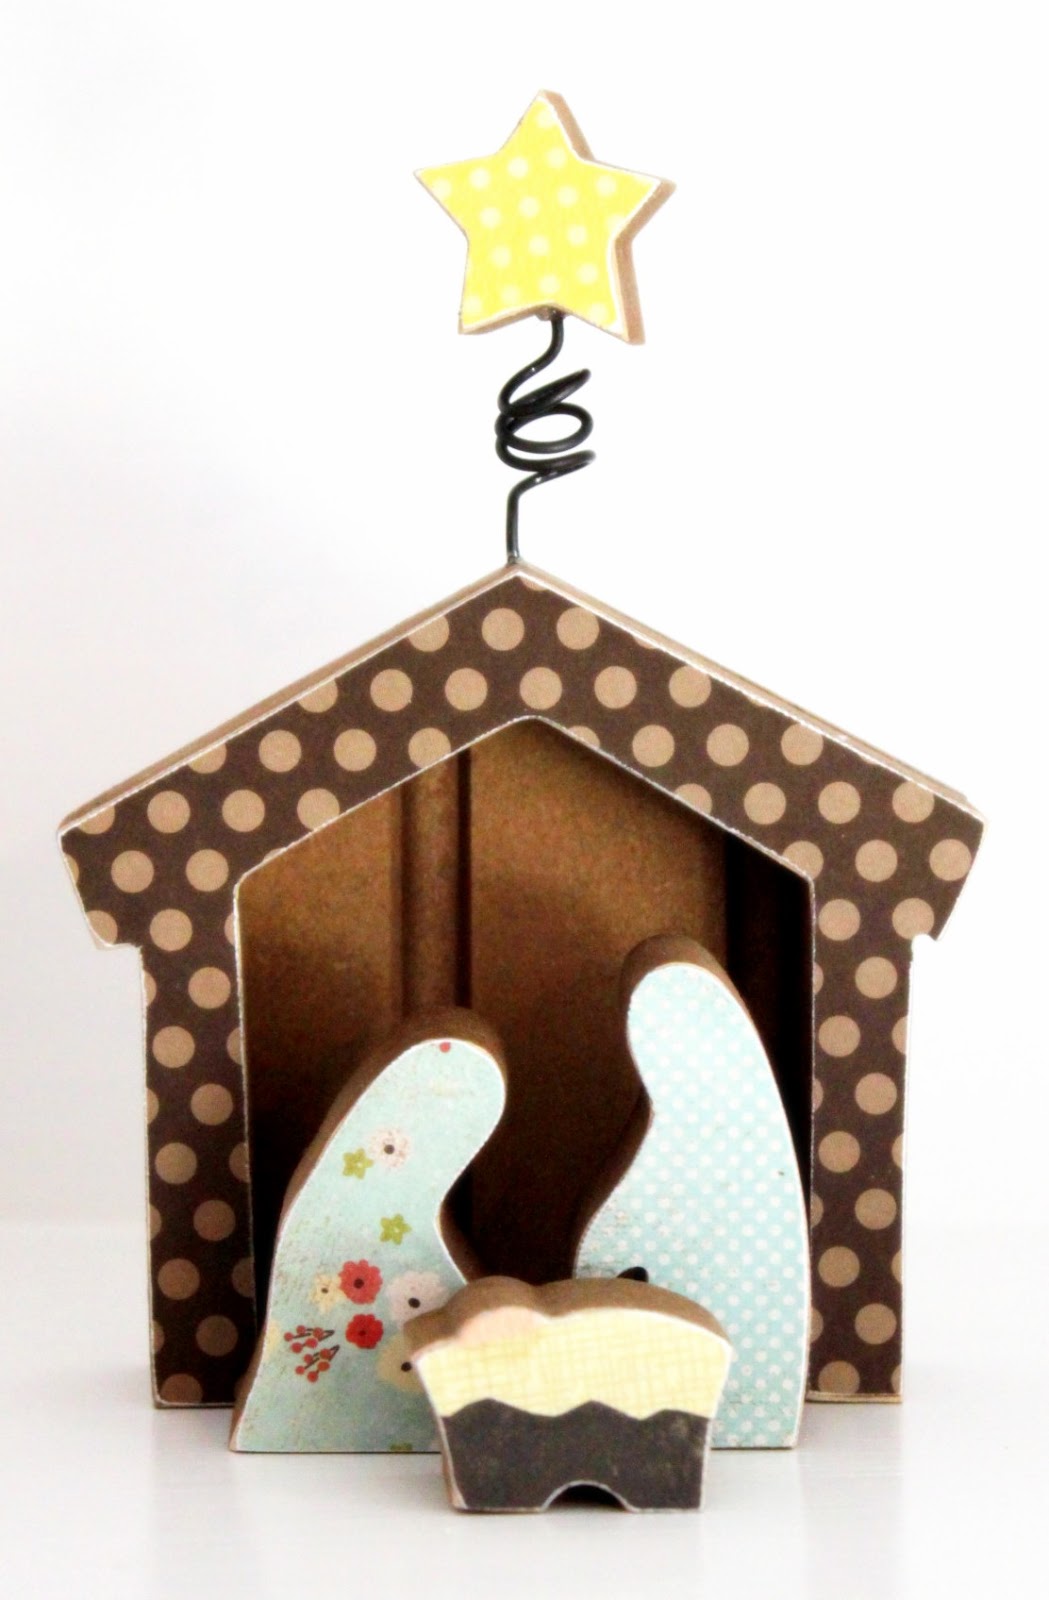
I'm really excited to share my take on Melinda's nativity set with you. This has actually been why my week has been so crazy, but all for the most wonderful of reasons. So first, here is what I did...


 Are you thinking, wow, that looks an awful lot like Melinda's? That's because for the most part, it is. In the past, I have helped Melinda to cut out a large amount of these sets, I have had my own set that she gave me for years--and I love it. My kids love it. So "re-doing" it wasn't going to happen. I needed another purpose, and as it turned out, I happened to have one.
I work with the young women in our church and while trying to come up with a service project for December, this nativity set and a sweet little book that I used while teaching pre-school came to mind. Together, they made up the perfect base for our 12 Days of Christmas service project.
 
The book that I based our project on is called "This Is The Stable", written by Cynthia Cotton.


It's a sweet, rhyming story, that introduces all the key players in the nativity in a pattern similar to "This is the house that Jack built" in that it always comes back to the "quiet stable, dusty and brown."

As the stable is the root of the story, I tweaked Melinda's a bit to make it really stand out.
 
 
 I made it taller, used bead board for the backing, gave it a cross beam, and added a base piece/platform to the front. Everything is cut from 1/2 inch MDF.
 
Then I had to add a few pieces from the story that were missing from the original set...
 
 
I needed a cow and the three gifts from the wise men...
 
 
...which meant I had to tweak the wise men to remove the gifts from their bodies, and last had to separate the manger from baby Jesus.
(Again, everything is cut from 1/2 inch MDF)
 
I love the simplicity of the story, and how each piece compliments it's part in the story.
We'll start our project tonight with a plate goodies and an introduction letter. Then each night after that we will deliver one part of the set along with it's part in the story and a coordinating gift until the set is complete!
Here's a little sample:
 
"This is the stable, dusty and brown, in a quiet corner of Bethlehem town."
(We will deliver the STABLE along with a gingerbread house kit for our family to build together)
 
"This is the star whose light shone down on the quiet stable, dusty and brown."
( we'll deliver the STAR piece along with a candle)
 
"This is the manger, filled with hay to feed the animals sheltered away from the chilly night when the star shone down on the quiet stable, dusty and brown."
( We'll deliver the MANGER along with a Hickory Farms set)
 
I love that the last night we are also including a copy of the book so the family can always remember this Christmas. We separated and wrapped all the gifts last night--my young women are so excited to get busy with this activity. Can you think of a better way to get them into the holiday spirit? I'm so beyond thrilled with how it all came together.
 
 
 I owe a huge chunk of it to Melinda and her nativity set--it made the whole thing come together! So thank you dear friend, for another great idea and fun month here at WYLTC...
 
Merry Christmas and Happy Crafting to you all! 
 
Wendy
 
**I will attempt to get the patterns for the additional pieces on here over the weekend just in case you want them...**


Wednesday, December 11, 2013

Nativity~Crafty Sisters


Merry Christmas from Crafty Sisters!
We too love Nativities and love making them!
We were so excited to make our version of Melinda's adorable pattern!
Thanks for sharing it with us Melinda!

A couple of weeks ago one of my friends brought in her oh so cute and very very tiny Nativity to church.
It must have been made from clay or something~all I know is that it was cute, teeny tiny and I envied it.
Is that bad to envy a Nativity?  Especially at church?  Probably~so I decided to cure my envy
with my version of Melinda's set.

I shrunk it down using Picasa so the sheets printed the pattern out at 4x6" size picture size sheets.
My little girl thought I was nuts to do it that small when she saw the pattern pieces....
but when I brought them in she squealed with delight over the cute shapes come alive in wood.  I cut everything out of 3/4" MDF.  The angel I propped up with a dowel and a random wood piece from Hobby Lobby and wired on the star.
I used my scroll saw to cut them out, using very tiny thin blades~like the thickness of pencil lead.
They will cut that fine detail~like in the Wisemen's head pieces and sheep's curly wool.  To me, it's the tiny details like that, that make something beautiful.  I put a quarter in the picture so you can see size comparison.  Fun right?

This was a perfect pattern to use up all my paper scraps!  After giving them a base coat of Americana Burnt Umber I Modge Podged on my paper and sanded away the edges for a nice clean look.
I love it!  I'm so excited for my daughter to come home and see it all ready.  She's in charge of arranging the Nativities at our house, a job I gave up long ago because seeing her be more excited about the baby Jesus than the presents under the tree~well that's what Christmas is all about!

Tuesday, December 10, 2013

Nativity- Sassy Sanctuary

Hello crafters!  Krystal from Sassy Sanctuary here.  I'm so excited about this month.  I LOVE nativities.  Slightly obsessed with them actually so I was super excited to make one. I was also super excited when Melinda asked us all to do a knock off of her cute pattern.  I love taking one project and seeing how different they turn out!

So anyway, without father ado... here is my nativity.


I love it!

I have to admit I had a hard time trying to decide how to make it my own.  My first instinct was to scrapbook paper them (because I LOVE me some scrapbook paper) but in the end I couldnt get away from the silhouette look. And I LOVED how Melinda had sanded hers is certain places to give them some character.


I'm kinda in love with this little lamb!

So in the end I decided to make mine on a board.  I love how it stays together and can be easiely moved around, but has way more depth then a sign would have.

Here is how I did it.


First off, you need some wood.  I got all my peices at Lowes.  The board and the bottom peice are all 1/2" and the board to cut the nativity out of is 1/4".

Then you need to get a copy of Melinda pattern.  You can find it HERE.  I had to scale it down a bit to fit my board, but then you just transfer it your wood and cut it out.

Once its cut, you can glue (I used wood glue) the bottom board to the main board and then arrange all the pieces.  (Don't glue down the nativity yet though) You may have to put some scrap wood on the back of a few pieces to keep them in the foreground.

Then paint everything.  I used white paint with a stain over treatment on my nativity pieces and used teal for the board. 

I also decided to glitter my star.  LOVE it!  (Oh, and the star I bought at Micheal's. The star I tried to cut out looked awful! Apparently I can cut a camel but a star is too hard for me... go figure!)


Now you can glue that nativity in place!  I used hot glue for this part.

And last you add the text.  I used vinyl to create a stencil and paint, but you could just use vinyl letters too.

And thats it!


Its a super cute addition to my (faux) mantle display and I had a ton of fun creating it!


Thanks for the inspiration Melinda!


Monday, December 9, 2013

Nativity Set from Under My Umbrella

 It's the most wonderful time of the year to be crafting!  Merry Christmas!  December is one of my favorite months because it seems there are so many wonderful things to see and taste but most of all we get to focus on the birth of our Savior.  I thought it would be fun to use a pattern of a nativity set I came up with a few years back.  Here is an example of one unfinished....


It's always amazing what different people can create with the same base project.  I emailed the ladies of WYLTC and they all responded they were up for the challenge.  I'm so excited to see what they come up with!   The first nativity set I painted up looked like this...


This time I knew I wanted to do something different.  I chose to do a lighter color and add a little burlap and jute.  I really should stop taking pictures with my phone!  It's become a slight addiction.  I don't even know where my camera is anymore.   I keep trying to decide which one I like better and have decided I like them both for different reasons.


If you tilt your head slightly the picture will look straight ;)


I always seem to have a kid story with every craft I make.  This one has to do with my oldest.  She is a teenager (gasp!!).  She typically doesn't have much to do with my crafting but she did this time and had an important lesson to share.  First a little back info....   My teenager is a funny girl.  She is quick, witty and has something funny to say about most things.  For example, after seeing this family photo, she titled it "The day my parents told me I'm adopted."

She isn't adopted but I now laugh every time I see this picture and love it even more.  It didn't make our Christmas card but it has earned a place in our home.  

Back to the craft project.  In the middle of taking pictures I decided the donkey should move.  I placed him and took a picture.  My cute teenager was standing behind me and made the comment that I should title that picture "Don't be the donkey of the family."


After she said it I decided it was a good lesson!  The donkey is the only piece not focusing on the Savior.  She was right.  It important to remember the reason for the season.   Wisdom from a 15 year old sometimes comes in a funny form!

Stay tuned for the next few days to see what the ladies of WYLTC do with this nativity set.  Be ready to be amazed...I am!!!  Happy Holidays!