Showing posts with label woodworking. Show all posts

Monday, December 8, 2014

Baby Jesus Ornaments from Crafty Sisters

Seasons Greetings from Crafty Sisters!
We are so glad to be back with Wood You Like To Craft and
December's theme of Baby Jesus Ornaments! Krystal, Wendy, Melinda, Candace and I thought it would be so fun to do an Ornament Exchange with a common theme.

We are so excited to share our little ornament with you!
Each year I make a new Baby Jesus ornament to give to my Primary kids I teach at church.  Sometimes it gets a little challenging because there's only so many ways to do a cute little pink face and a brown manger right?

This year I wanted to do a lighter theme and use some spray glitter!
Here's the little pattern I came up with.
The finished size is about 3 1/2" tall by 2 1/2" wide.
I cut both pieces out of 1/4" MDF.  This thickness is just right for ornaments and gives you enough thickness to be able to screw in a tiny "i" hook to attach either ribbon or ornament hooks.  Make sure you pre drill your holes because MDF can split easily when you put in those hooks.
Once cut and sanded I painted them a really light buttermilk for the swaddling cloth and a a light tan for the manger.  Again~make sure you paint the back~it makes the perfect place to either write in a Christmas greeting or to date the year you created the ornament.
Remember our great tip for painting all those little baby heads?  Stick them onto some masking tape that you can stick to your counter.  It makes it so easy to paint all those heads but even easier to dot all those little eyes with out them rolling off under your oven to find next year!  The perfect size head is a wooden 1" plug found at your local craft store or home improvement store.

After everything is painted and dried I always sand of a bit of the edges to create a highlighted look.  I glued everything together with hot glue, running a strip of glue along the bottom of the swaddling edge to stick a bit of excelsior onto.  Then if you are in a glitter mode do a light spray of glitter followed with a bit of clear craft spray to seal everything in.  
There ya go~a perfect little Baby Jesus ornament.....now I only have about 80 more to make......

We are so excited to see what Krystal, Melinda and Wendy come up with and I'm even more excited to get one in the mail to hang on my tree!  Make sure to come back each day this week to see what they create!  
Merry Christmas!


Tuesday, March 4, 2014

Crafty Sisters Welcome Spring!

We don't get any more excited about crafting than Spring Time~Halloween is a close second...
We were more than happy to whip something up for Spring and here's our little grassy mound of flowers to celebrate sunshine, warmer weather and all the tulips ready to pop out!

First we cut out our flowers from 3/4" MDF.
1/4" dowels work perfect for the stem and they are thick enough that they won't break easily.
Our grassy mound is from a left over chunk of 2x6".
Look closely and you might be able to see some bevel action going on!
                        
If you don't have a table belt sander~get one.
They work perfect for sanding things quick but also give you beveled edges very easily too!
This Ryobi model is found at Home Depot for only $100.
                                     
Each year when my tax return comes I try to buy one decent tool for either my 
wood working or for the garden.  I kick myself that I didn't get this sooner than I did.
Not sure what I want to buy this year~suggestions for your favorite tools?
Do tell!

After cutting everything out we painted the wood with cute Irish Moss green paint,
Modge Podged on some cute scrap booking papers
and of course had to add some ribbon and lady bugs.
And yes, we did add some glitter!
Welcome Spring indeed! (Yes, watching a few too many English shows, can you tell?)
Thanks for the great idea Wendy!  Can't wait to see what Krystal and Melinda do!


Monday, February 3, 2014

Valentine Love Birds Crafty Sisters

I don't know what it is about Love Birds~but I can't get enough of bird themed Valentines!
I knew this month I wanted to make something with birds and this weekend as
I was watching a show with a Valentines Day dance I was inspired what to do.
I've always disliked how this holiday seems to be only about 2 people in love....
My true life love story isn't just me and my hubby, it includes our little girl too!

So here's our family of little Love Birds~Love Is Tweet Bird Cage!
I first cut out my little shapes from 3/4" MDF.  That is my favorite wood to cut out of.
It's easy to cut, easy to paint, too dusty for my taste but it works great!

I predrilled my holes, sanded down my sides and then did a base coat of Americana Light Buttermilk paint.
Using a few scraps left over from previous projects I then covered my birds with cute papers.
Don't forget to add some eye balls!
Using thick fencing wire I then created my bird cage.  Each end is threaded through the base and curled over so it won't slip through.  You can find this wire in the fencing department at Home Depot for less than $5 and the roll will last you forever
Once all the wires were in place I took a shorter piece of wire and wrapped it through the top to create some stability.  With some of the excess wire I was able to thread on a little heart finial topper.

Just tie on some cute ribbons and print a cute little label off the computer, adorn it with some glitter and you are good to go!


Tuesday, January 14, 2014

Snowman~Crafty Sisters

Like Krystal I have that "Do you want to build a snowman" song stuck in my head too!
In my house there isn't much shelf space available to it has made me a wall hanger kind of gal.
I love having something seasonal hanging out my front door to greet everyone and this little guy did the trick!

I have always been a doodler and that's how Candace and I really started crafting together.
We'd see all sorts of cute things in stores that were crazy over priced or the image would be on a cute card and we'd think "wouldn't that be cute hanging on my door"?
So with this snowman project I doodled out on a big sheet of packing paper what I wanted out of my snowman project.  Of course I had to ask Candace first since she's my craft co-conspirator!
I cut the main body out of 1/2" MDF so it's not too heavy to hang up.

The hat brim, the carrot nose and the mitten top were cut from 1/8" MDF.  The key to great looking projects is having different textures and thickness.  It's amazing how that snowman nose is so much cuter as a separate piece of wood than just painted on.  It's worth the extra work.
I didn't paper anything this time~can you believe it?  I free handed a few snow flakes on the mitten and some stripes on the top.  The scarf was a piece of fleece that's 50% off this week at JoAnn's.  I drilled two small holes on each mitten side to thread some wire on for easy hanging.  Super easy project I promise!!!

I love it! Can't wait to see what the other gals do!  Thanks for the great theme Krystal!

Snowman built!  Check!  Happy Tuesday everyone!~

Wednesday, December 11, 2013

Nativity~Crafty Sisters


Merry Christmas from Crafty Sisters!
We too love Nativities and love making them!
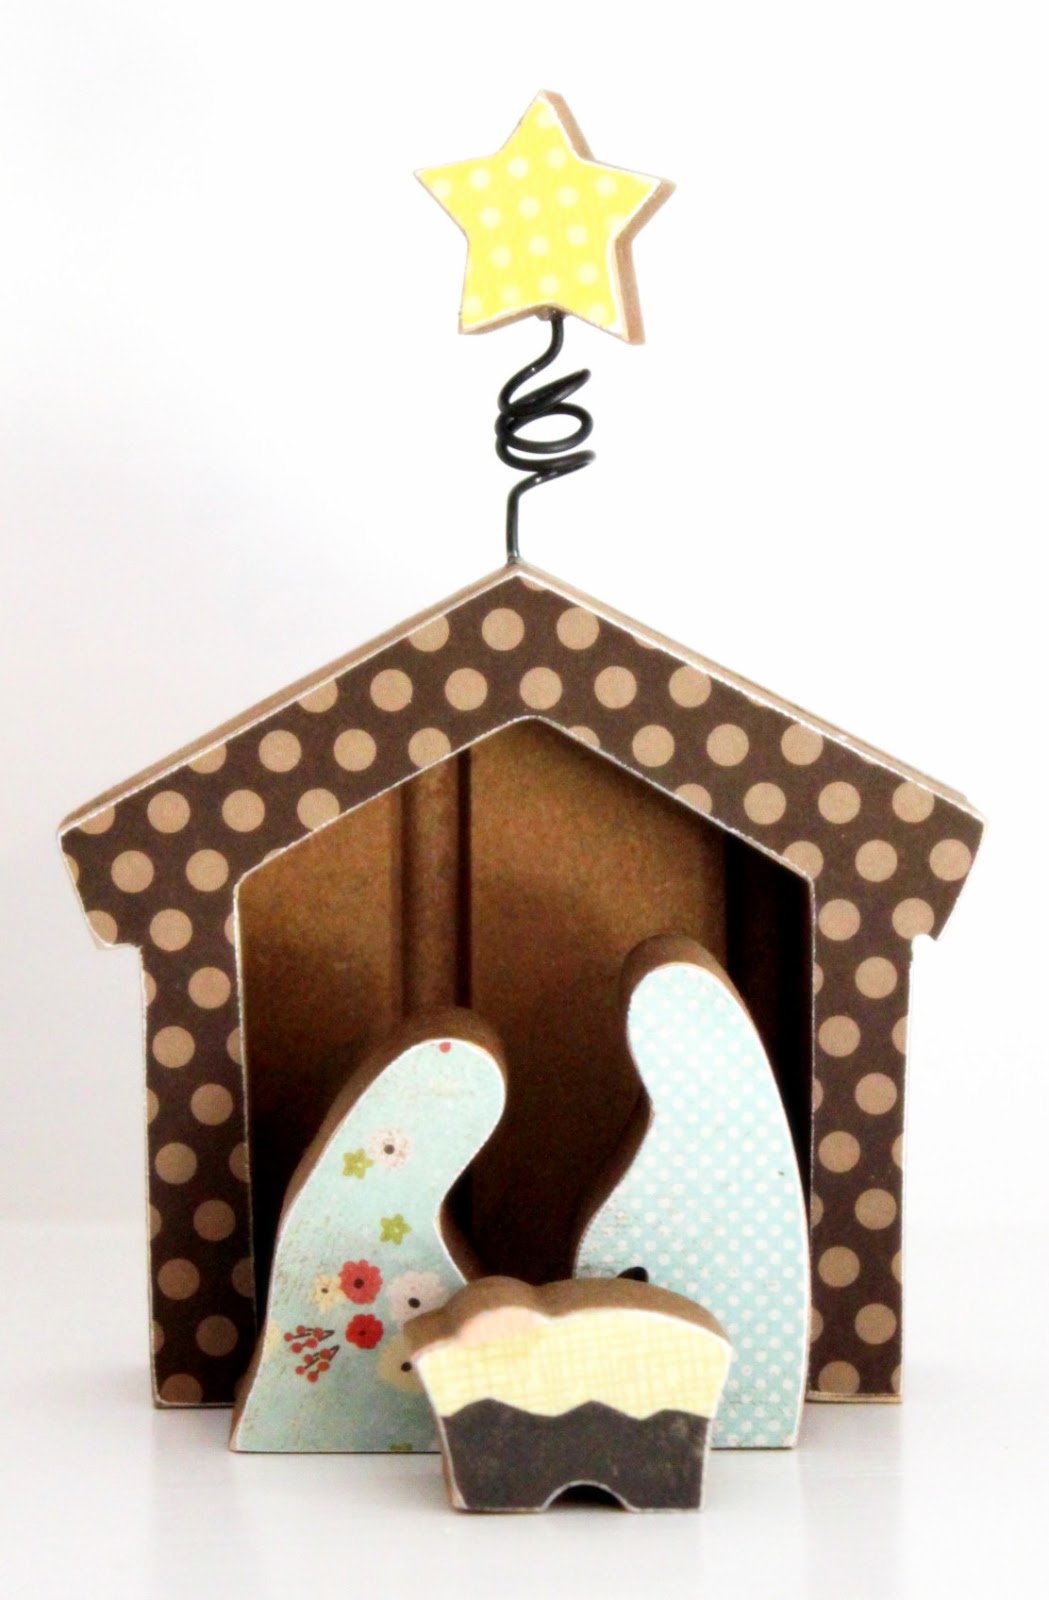
We were so excited to make our version of Melinda's adorable pattern!
Thanks for sharing it with us Melinda!

A couple of weeks ago one of my friends brought in her oh so cute and very very tiny Nativity to church.
It must have been made from clay or something~all I know is that it was cute, teeny tiny and I envied it.
Is that bad to envy a Nativity?  Especially at church?  Probably~so I decided to cure my envy
with my version of Melinda's set.

I shrunk it down using Picasa so the sheets printed the pattern out at 4x6" size picture size sheets.
My little girl thought I was nuts to do it that small when she saw the pattern pieces....
but when I brought them in she squealed with delight over the cute shapes come alive in wood.  I cut everything out of 3/4" MDF.  The angel I propped up with a dowel and a random wood piece from Hobby Lobby and wired on the star.
I used my scroll saw to cut them out, using very tiny thin blades~like the thickness of pencil lead.
They will cut that fine detail~like in the Wisemen's head pieces and sheep's curly wool.  To me, it's the tiny details like that, that make something beautiful.  I put a quarter in the picture so you can see size comparison.  Fun right?

This was a perfect pattern to use up all my paper scraps!  After giving them a base coat of Americana Burnt Umber I Modge Podged on my paper and sanded away the edges for a nice clean look.
I love it!  I'm so excited for my daughter to come home and see it all ready.  She's in charge of arranging the Nativities at our house, a job I gave up long ago because seeing her be more excited about the baby Jesus than the presents under the tree~well that's what Christmas is all about!

Thursday, November 14, 2013

Crafty Sisters Turkey

 Hello from Crafty Sisters!
We were so glad for this month's Thanksgiving/Turkey theme!
I've had this turkey mostly cut out for about 4 years now, just laying in my shed, begging to be put together.
Isn't he cute!
 About 5 years ago I saw his doppelganger over at my friends house, a purchase from a bazaar some 10 years before, and I knew I needed one too.
This turkey is just shy of 3 feet tall.  The original had boots with socks but I tend to love those silly big feet instead.  Everything is cut from 1" pine except for his hat brim and beak which are 1/4" MDF and the feet are from 2" pine.  I used 5/16" size dowel for the legs because the little 1" balls from Hobby Lobby fit perfect on them for "knees".:)

I cut the back feathers in slimmer pieces because the wood is cheaper that way and I knew the seam would be covered.
After locating all my parts and cutting out new "missing" parts I ran all the edges down my table sander for a fun chunky look.  You can do this with a dremel but it takes way longer.  If you really love woodworking or are ready to get serious about having fun with it I completely recommend getting a table top sander.  They are about $100 but once you figure how much time you waste with little hand held sanders....you'll realize it is the best money you've ever spent!
First you'll need to give everything a good coat of paint.  I always water my paint down so it gives it more of a "stain" appearance then thick goopy paint.  You can always add more layers of paint~it's really hard to take it away.
The body I painted Americana Light Buttermilk.
The back leaves were Americana Napa Red, with a second coat of the Napa Red mixed with a bit of Burnt Umber till I go the effect I liked.
The hat was Ebony Black and the feet were Burnt Orange~which is probably my favorite orange paint color ever!
Using a toothbrush and some watered down black paint, I speckled all the pieces.
The original bird had lots of little leaves for feathers but guess what~due to over commercialization in the market place of Christmas, you can't find any small leaves....anywhere.  The gal at Hobby Lobby suggested I but a $99 swag to rip apart for the leaves.  Yes, fantastic solution was all I could think.  They did have 2 sets of these giant leaves that worked fine.  Yes, I'm a bit sarcastic this morning.....

Once you're paint is dry, go over all the edges with a hand sander to distress them a bit.
I follow the sanding with a bit of watered down Burnt Umber paint on an old wash rag.  Light enough to distress, easy with the rag to control how much goes on.  
Remember.....a little goes a long way.  You want it distressed, not grungy.  If you go grungy~next year you'll want to through that dirty turkey away.
While you wait for the paint to dry get working on the bloomers.
These are what made me fall for this turkey in the first place, they are so fun!
First attach the dowels to the feet~don't connect to the body or else you can't get the bloomers on.
Cut 2 of the same huge rectangles of desired height and width then snip up the middle to create some legs.
I used my glue gun to put these together~no sewing!
 Then with a needle and thread I did a very loose stitch around the waist and legs to gather them up.
Using your glue gun you can adhere them in place around the waist.
Don't forget to stuff them!  I used plastic grocery store bags.  Why you ask?
I have tons, they stay puffed and why not?

Using other scraps of fabric you can add ties to his waist, legs and a little collar with a bow for his next and hat.  I had a few buckles left over from my witch shoes that I used for his hat.

Now you can attach the the back feathers with a little glue and a few screws to hold them all tight.
Here is my plea.....make sure you do a quick coat of paint on the back.  Nobody likes an unfinished bird.  He will be destined for a life up against a wall.  Just like the Geico girls....
"Don't do it Kimber......don't forget to paint the back of your bird!"  All that hair....and you know they left the back flat and lifeless.
These obviously are my favorite commercials right now~thanks Geico!
Pretty simple project and he's so cute!  Now to make the matching Pilgrims....
Happy Thanksgiving from Crafty Sisters!

Monday, October 7, 2013

Halloween Beware Sign Crafty Sisters


Hello from Crafty Sisters! 
Today we are sharing a fun "BEWARE" sign with you!
I don't think that we get any more excited about any holiday as much as we do Halloween!
I started pulling all of my Halloween stuff out this weekend finally to decorate and it just makes
me giddy getting it out!

We wanted to share a quick, easy and very budget friendly Halloween decoration this month.
Candace and I made a version of this sign about 6 years ago and my little sign has taken a beating over the years so I needed to update it!
All you'll need is:
6 rectangles with dog eared corners about 3" x 3.5".  I used my scraps of 3/4" thick MDF and drilled a little hole at the top of each piece.
6 coordinating pieces of scrap book paper (again great use of leftover scraps) 3' x 3.5".
BEWARE letters cut from your Cricut or you can use chipboard letters~make sure they fit on the rectangle!
Black fencing wire
Various beads
Branches about 4 feet in length
Black spray paint
Silver spray glitter
Ribbon or Raffia

I gathered the branches from my Sycamore tree (which I love to hate), it dumps branches in a downpour when ever the wind comes around.  I wrapped them together with the heavy duty wire (you can find this at Home Depot in the Fencing Department for under $5 for the huge roll!  Then just spray paint and glitter away!
While you wait for that to dry give your little blocks a quick coat of paint and glue your papers and letters into place.  I have a love affair with glitter...I can't seem to make any project without adding some!
Cut wire in 12" section and thread the beads on after you've threaded it through the blocks.
Hobby Lobby has a lot of their beads on sale this week 50% off!

Once you've got your beads in place you can secure the wires to the bundled branches.
You can add some raffia and pretty ribbon for an extra pop!
Sometimes raffia is a bit straight for me~did you know you can curl it?  If you have an old curling iron~this is my mini from highschool~yes, it completely dates me~it works perfect for curling raffia!
The fencing wire is nice and thick so you can position the hanging blocks just right.
There ya go~a quick, easy and inexpensive Halloween sign to greet your visitors!
Make sure to check back this week to see what Krystal, Wendy and Melinda have to share!
Happy Halloween from Crafty Sisters!

Tuesday, September 10, 2013

Kitchen EAT Letters-Crafty Sisters

Hello from Crafty Sisters!
We loved Krystal's Kitchen theme this month and we have a fun set of
EAT letters that are perfect for decorating in your kitchens.

We thought it would be fun to show 3 separate sets that we've put together from the
same set of letters that we cut from 3/4" MDF.
You can also find unfinished letters to use in your local hobby store but if you are adventurous enough to try cutting out your own check out www.dafont.com for a huge selection of fun fonts you can use.

All you will need are wood letters, paint, Mod Podge, scrap booking paper and your embellishments.

With these sets we used a fork we got at the thrift store and flattened it with a rubber mallet to create a sign holder that says Bon Appetit!  We glued it on with some E6000 which works great gluing metal.
 There are so many cute little embellishments you can use~by the way Hobby Lobby has a great sale this week on all sorts of little embellishments 50% off!
Here is another set we did with neutral black and white papers.
It's always amazing to me how you can personalize a set of letters to make them your own!
This watermelon inspired set were some I put together for a client and I cut out a separate little watermelon to go with them.  They turned out so fun!
Thanks for the fun theme Krystal~we love your menu planner!

Thursday, July 4, 2013

4th Of July Banner Crafty Sisters

Happy 4th of July!
Candace and I hope you are having a wonderful holiday
and we're excited to share our cute little wood Patriotic banner with you!
It's pretty simple~we just made elongated pennants approximately 4 x 10 inches.
We cut them from 1/8" MDF, it's perfect for banners, not too heavy, not too thick, and makes them
a whole lot sturdier to store and hang.
What made these pennants fun was that we cut out a separate piece to layer on the top.
Scallop, round and triangle edges add a bit of pop and depth to each pennant.

I find that my banners all end up looking very similar though, I can resist to bejewel them
for a little pop!  I guess it's okay to go along with today's "sparklers" right?!
Wishing you the best from Crafty Sisters and a very grateful thanks for all those
who serve to make our freedom possible!